How it works

How the add-ons and tools work, and which ones fit your printer.

Want to see it in person? Visit our Mansourieh shop: we'll show you how it works and let you try it.

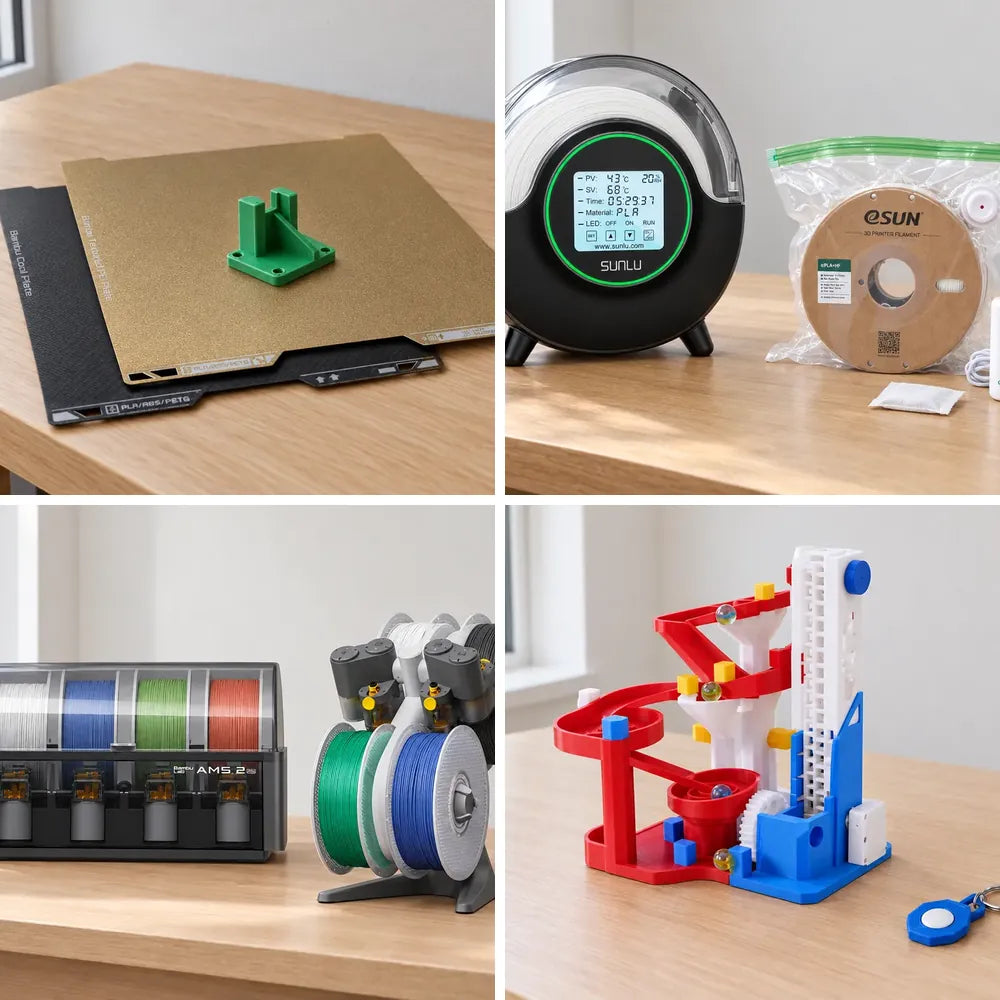
A Sunlu S2 filament dryer with a spool inside, next to a spool sealed in an eSUN vacuum bag with its USB pump, on a wooden table

Keep your filament dry

For anyone whose prints have started popping, stringing or breaking, or who keeps opened spools through a humid coastal summer. Learn the signs of wet filament, how hot and how long to dry each material, and which dryer, bag or heated AMS fits your setup.

At a glance

FilamentTemperatureTime
PLA50 °Cabout 8 h
Silk PLA55 °Cabout 8 h
PLA-CF50-60 °Cabout 8 h
PETG, PETG-CF60-65 °Cabout 8 h
TPU70 °Cabout 8 h
Nylon blends (PA6-CF, PAHT-CF)75-85 °C8-12 h

Bambu Lab's chart, for a dryer with a fan. Bambu Lab spools in an AMS 2 Pro or AMS HT set this themselves. The S1 Plus stops at 55 °C, so keep it for PLA; for nylon use the E2 or an AMS HT.

Step by step
  1. Check for the signs. Listen for popping or crackling at the nozzle. Look for new stringing, a rough or bubbly surface, or parts that break too easily. If you see these, or a spool has sat open in humid air, dry it before you change any settings.
  2. Choose the right heat. Pick your material's preset on the dryer, or use the temperatures listed below. Never dry PLA at the higher heat that PETG, TPU or nylon need: it softens and deforms, so take the PLA out first. At 70 °C and above, check that your spool can take the heat, since some spools warp.
  3. Start the dryer or the AMS. Set the spool in the dryer and, if you plan to print from it, pass the filament end out through the outlet hole. Close the lid and start. In an AMS 2 Pro or AMS HT, take out any PLA and TPU before you dry PETG or anything hotter. Close the lid, start drying on the printer's screen and follow its prompts. Keep the lid shut until it ends.
  4. Print while it is dry. Feed the printer straight from the dryer's outlet, the same way as a spool on the printer's own holder, or load the spool into a closed AMS right away. With a heated AMS (AMS 2 Pro, AMS HT, or a 1st-gen AMS with the Sunlu AMS Heater), the spools dry where they sit.
  5. Seal what you are not using. Put each opened spool in a vacuum bag with a desiccant pack, close the zip and pump the air out. Keep the AMS lid shut and its desiccant fresh. An AMS Lite is open to the room, so in humid weather put its spools back in their bags when the print is done.

Common questions

How do I know my filament is wet?

Wet filament pops or crackles at the nozzle as the water inside turns to steam. Prints show new stringing, a rough or bubbly surface and weak, brittle layers, and the filament itself can turn brittle and snap on the spool (old filament can too). If a freshly dried spool still prints badly, send us a short video on WhatsApp: it may be the printer, and we repair printers at our Mansourieh workshop.

Which materials need drying, at what temperature and for how long?

Bambu Lab's chart for a forced-air oven (a filament dryer heats the same way, with a fan): PLA 50 °C, silk PLA 55 °C, PLA-CF 50-60 °C, PETG and PETG-CF 60-65 °C and TPU 70 °C, each for about 8 hours, and nylon blends such as PA6-CF and PAHT-CF 75-85 °C for 8-12 hours. Bambu Lab lists drying before use as required for TPU and nylon, and recommended for PLA and PETG, above all once they show the signs or have sat open. An AMS 2 Pro or AMS HT picks the settings itself for Bambu Lab spools. The S2, S4 and SP2 reach 70 °C for PLA, PETG and TPU, and the S1 Plus stops at 55 °C, so keep it for PLA. For nylon, use the E2 (up to 110 °C) or an AMS HT (85 °C).

Dryer, vacuum bags or a heated AMS: which one for my setup?

Vacuum bags suit every setup: they keep opened spools dry between jobs. Add a dryer to rescue wet spools and to print TPU or nylon straight from it. For Bambu Lab multicolor printing, a heated AMS dries spools where they sit: the AMS 2 Pro (4 spools, up to 65 °C, for PLA and PETG; on X1, P1, A1 and A2L printers it needs its own Switching Adapter to dry), the AMS HT (1 spool, up to 85 °C, for TPU, nylon and most carbon-fiber blends), or the Sunlu AMS Heater if you already own a 1st-gen AMS. Each printer needs its own connection parts for an AMS 2 Pro or AMS HT, so send us your printer model on WhatsApp before you buy.

Can I print straight from the dryer into my AMS or AMS Lite?

Into the printer, yes: Sunlu dryers have a filament outlet, so one spool can feed the printer while it dries, just like a spool on the printer's own holder (the filament goes to the printer, not through the AMS). The AMS and AMS Lite feed from spools sitting in or on them, so for multicolor prints dry the spools first, or use a heated AMS. The Sunlu AMS Heater dries a 1st-gen AMS during prints. The AMS 2 Pro and AMS HT can dry during prints on the H2D, H2S, P2S, X2D and A2L with up-to-date firmware (on the P2S and X2D, an AMS 2 Pro needs its Switching Adapter for this), and between prints on other models such as the X1, P1 and A1.

How do I store opened spools in a humid summer?

On the coast in summer, seal every spool you are not printing with: a vacuum bag with a desiccant pack, or a sealed box like the SP2, which Sunlu measured at about 25% humidity inside a 50% humidity room. A closed AMS with fresh desiccant is fine for the spools you use every day, but an AMS Lite is open to the room, so bag its spools when you finish printing. Bambu Lab says freshly dried filament in normal room air (around 55% humidity) can take up enough moisture to affect prints within 2 to 12 hours. Sunlu warns that nylon, TPU and PVA can become unusable after a few hours in humid air, so dry them again before an important print.

Products in this guide

Sunlu Filament Dryer S2 Sunlu Filament Dryer S2One-spool dryer up to 70 °C with one-touch presets for common filaments such as PLA and PETG; print while it dries.$100.00
Sunlu Filament Dryer S4 Sunlu Filament Dryer S4Four 1 kg spools up to 70 °C with 8 outlets: dry a full color set before a multicolor job, or feed several printers.$200.00
Sunlu Filament Dryer SP2 Sunlu Filament Dryer SP2Dryer base plus sealed storage box (35-70 °C): dry, then keep the spools sealed in the box.Pre-Order$150.00
eSUN eVacuum Kit Pro 3 Filament Vacuum Storage Bags eSUN eVacuum Kit Pro 3 Filament Vacuum Storage BagsVacuum bags, USB pump and desiccant: the everyday way to store opened spools.$25.00
Sunlu AMS Heater Sunlu AMS HeaterHeated lid for the 1st-gen AMS only (35-70 °C): dries spools inside the AMS during prints. Not for AMS Lite, AMS 2 Pro or AMS HT.$190.00
Bambu Lab AMS 2 Pro Switching Adapter (EU) Bambu Lab AMS 2 Pro Switching Adapter (EU)Needed for AMS 2 Pro drying on X1, P1, A1 and A2L printers. On H2, P2S and X2D printers: one for each extra AMS 2 Pro drying at the same time, and on the P2S and X2D to keep printing while an AMS 2 Pro dries.$39.00Choose options
Sunlu Filament Dryer E2 Sunlu Filament Dryer E2Up to 110 °C: the dryer for nylon, nylon-CF and PC, and for annealing printed parts.Coming Soon$500.00View product
Bambu Lab AMS 2 Pro Bambu Lab AMS 2 ProSealed 4-spool AMS that dries up to 65 °C. Works with every Bambu Lab printer, with the connection parts each one needs.Pre-Order$430.00View product
Bambu Lab AMS HT Bambu Lab AMS HT1-spool AMS that dries up to 85 °C: TPU, nylon and most carbon-fiber blends.Pre-Order$200.00View product
All guides ↑
A Bambu Lab AMS 2 Pro and an AMS Lite, each holding four colored spools, on a wooden table

Which AMS fits my printer?

For Bambu Lab owners who want to print in more colors or add another AMS. Learn which AMS works with your printer, how the AMS Lite, AMS 2 Pro and AMS HT differ, which extra parts you need and which spools fit.

At a glance

PrinterAMS that fitsWhat else you need
A1, A1 miniOne AMS Lite, or up to 4 AMS 2 Pro, AMS HT or 1st-gen AMS (not both at once)For anything but the AMS Lite: the AMS Hub - A1 Series on a bracket you print first. A Switching Adapter for each AMS 2 Pro that dries.
A2LAMS Lite, plus up to 4 AMS 2 Pro, AMS HT or 1st-gen AMSOne unit plugs in with the parts in the box; a 4-in-1 PTFE Adapter from the second. A Switching Adapter for each AMS 2 Pro that dries.
X1, P1Up to 4 AMS 2 Pro, AMS HT or 1st-gen AMS (no AMS Lite)One unit: a filament buffer, PTFE tube coupler and 4-pin cable (already there if it runs an AMS). Two or more: the AMS Hub. A Switching Adapter for each AMS 2 Pro that dries.
P2SAMS 2 Pro, AMS HT or 1st-gen AMS (no AMS Lite)Up to 2 units through the Combo's filament buffer; a 4-in-1 PTFE Adapter from the third.
H2D, H2C, X2DAMS 2 Pro, AMS HT or 1st-gen AMS (no AMS Lite)Up to 2 units plug straight in; a 4-in-1 PTFE Adapter from the third.
H2SAMS 2 Pro, AMS HT or 1st-gen AMS (no AMS Lite)One unit plugs straight in; a 4-in-1 PTFE Adapter from the second.

The H2D, H2C, H2S, P2S and X2D power one drying AMS 2 Pro themselves; add a Switching Adapter for each extra one. Drying while printing works on the H2D, H2S, P2S, X2D and A2L with up-to-date firmware, not yet on the X1, P1, A1 and A1 mini.

Step by step
  1. Start from your printer. Check the model name on your printer. The A1, A1 mini and A2L can use the open AMS Lite. Every Bambu Lab printer can use the sealed AMS 2 Pro and the 1-spool AMS HT, but the X1, P1, P2S, H2D, H2C, H2S and X2D cannot use the AMS Lite.
  2. Choose by what you print. For PLA and PETG in our humid coastal summers, the AMS 2 Pro keeps 4 spools sealed and dries them at up to 65 °C. For nylon, PC or other engineering filament, add an AMS HT: it dries 1 spool at up to 85 °C. The AMS Lite is the simple choice on an A1, A1 mini or A2L for everyday PLA and PETG, but its spools sit in the open air and it does not dry them.
  3. Get the connection part your printer needs. A1 and A1 mini need the AMS Hub - A1 Series, on a bracket you print first, to run an AMS 2 Pro, AMS HT or 1st-gen AMS. X1 and P1 need a filament buffer, a PTFE tube coupler and a 4-pin cable for one unit; for two or more, the AMS Hub takes the buffer's place. A printer that already runs an AMS has the buffer, coupler and cable. The A2L and H2S connect one unit, and the H2D, H2C, X2D and P2S Combo up to two, with the parts in their box; a P2S bought without an AMS needs its own filament buffer.
  4. Plan power for drying. On an A1, A1 mini, A2L, X1 or P1, each AMS 2 Pro needs its own Switching Adapter to dry. The H2D, H2C, H2S, P2S and X2D power one drying AMS 2 Pro themselves; add an adapter for each extra one, and on the P2S and X2D also to keep printing while it dries. Feeding a print from an AMS while it dries works on the H2D, H2S, P2S, X2D and A2L with up-to-date firmware, not yet on the X1, P1, A1 or A1 mini. The AMS HT always dries on its own power cord, which comes in the box and runs on 220 V.
  5. Check your spools. The AMS 2 Pro and AMS HT take spools 197-202 mm across and 50-68 mm wide; spools outside that size feed from a spool holder instead. Put Bambu Lab refills on a reusable spool first. On cardboard spools in an AMS 2 Pro, AMS HT or 1st-gen AMS, fit a printed edge ring made for the AMS, because the AMS rubs and wears the cardboard edges.
  6. Update, connect and load. Update the printer's firmware before you connect a new AMS (an A1 or A1 mini needs version 01.07.00.00 or later for the hub). Use the new 6-pin cable that comes with each AMS 2 Pro or AMS HT, not an old 1st-gen cable, then load filament from the printer's screen. If something won't connect, send us a photo of the back of your printer and AMS on WhatsApp.

Common questions

Which AMS works with the A1, A1 mini, A2L, P2S, H2D, H2C, H2S, X2D, X1 and P1?

A1 and A1 mini: one AMS Lite, or up to 4 AMS 2 Pro, AMS HT or 1st-gen AMS units through the AMS Hub - A1 Series, never both at once. A2L: an AMS Lite plus up to 4 AMS 2 Pro, AMS HT or 1st-gen AMS units at the same time; the AMS Lite then uses 3 of its 4 slots. X1, P1, P2S, H2D, H2C, H2S and X2D: the AMS 2 Pro, AMS HT and 1st-gen AMS, but never the AMS Lite.

AMS Lite, AMS 2 Pro or AMS HT: what's the difference?

The AMS Lite holds 4 spools in the open air, does not dry them and cannot feed regular TPU or most carbon-fiber filament (Bambu Lab's TPU for AMS and PLA-CF are fine). The AMS 2 Pro keeps 4 spools sealed and dries them at up to 65 °C, right for PLA and PETG. The AMS HT holds 1 spool, dries at up to 85 °C for nylon, PC and other high-temperature filament, and has a bypass outlet for soft TPU and most fiber-filled filament, which you push to the printer by hand.

Can I add a second unit, and which extra parts do I need?

Not a second AMS Lite: each printer takes only one, though the A2L can add AMS 2 Pro or AMS HT units next to it. X1 and P1 swap their filament buffer for the AMS Hub (up to 4 units), and A1 and A1 mini chain up to 4 units on the AMS Hub - A1 Series. The H2D, H2C, P2S and X2D take two units directly and need a 4-in-1 PTFE Adapter from the third; the A2L and H2S need one from the second. The H2C uses the H2 version, and one comes in its box. Each new unit comes with its own 6-pin cable, and each AMS 2 Pro you want to dry needs a Switching Adapter, except one on an H2D, H2C, H2S, P2S or X2D.

Is my AMS the 1st generation?

Check the ports on your 4-spool AMS: an AMS 2 Pro has its own power socket for a Switching Adapter, besides its 6-pin cable ports, and can dry filament. A 1st-gen AMS has no power socket of its own, runs on power from the printer and cannot dry. The AMS HT is easy to spot, with 1 spool and its own power cord. This matters for upgrades: the Sunlu AMS Heater fits only the 1st-gen AMS, and an AMS 2 Pro that replaces one on an X1 or P1 plugs into the same buffer with the new 6-pin cable from its box.

Which spools fit, including cardboard spools and refills?

The AMS 2 Pro and AMS HT take 1.75 mm filament on spools 197-202 mm across and 50-68 mm wide, and the AMS Lite takes spools 40-68 mm wide with a 53-58 mm center hole, gripping cardboard spools by that hole. An AMS 2 Pro, AMS HT or 1st-gen AMS rubs the edges of cardboard spools until they flake, so fit a printed edge ring made for the AMS (Elegoo offers a free model and suggests printing it in PETG). Refills need a reusable spool: Bambu Lab's white Low Temp spool is for PLA and PETG up to 70 °C, and the black High Temp spool handles up to 90 °C, so use that one for hotter drying in an AMS HT.

Products in this guide

Bambu Lab AMS Lite Bambu Lab AMS LiteOpen 4-spool AMS for the A1, A1 mini and A2L, one per printer. No drying; grips cardboard spools by the center hole.$349.00
Bambu Lab AMS Hub Bambu Lab AMS HubFor X1 and P1 only: replaces the filament buffer so the printer can run 2 to 4 AMS units.$66.00Choose options
Bambu Lab AMS Hub - A1 / A1 Mini Bambu Lab AMS Hub - A1 / A1 MiniLets an A1 or A1 mini run up to 4 AMS 2 Pro, AMS HT or 1st-gen AMS units instead of the AMS Lite.$27.00
Bambu Lab AMS 2 Pro Switching Adapter (EU) Bambu Lab AMS 2 Pro Switching Adapter (EU)Powers AMS 2 Pro drying: one per unit on an A1, A1 mini, A2L, X1 or P1, and one per extra drying unit on an H2D, H2C, H2S, P2S or X2D. On a P2S or X2D it also lets the printer keep printing while the AMS dries.$39.00Choose options
Sunlu AMS Heater Sunlu AMS HeaterAdds drying to a 1st-gen AMS only (not the AMS Lite, AMS 2 Pro or AMS HT).$190.00
Bambu Lab TPU for AMS Filament Bambu Lab TPU for AMS FilamentThe TPU made to feed through an AMS: Bambu Lab rates it for every AMS, including the AMS Lite. Regular soft TPU needs the AMS HT bypass or the printer's spool holder.$47.00Choose options
Bambu Lab Reusable Spool - Pack of 5 (Refurbished) Bambu Lab Reusable Spool - Pack of 5 (Refurbished)Reusable spools for Bambu Lab refills, so a refill fits any AMS like a normal spool.$9.00
Bambu Lab PLA Basic Filament Bambu Lab PLA Basic FilamentBambu Lab PLA Basic, also sold as a 1 kg Refill without a spool: mount it on a reusable spool.From $21.00Choose options
Bambu Lab AMS 2 Pro Bambu Lab AMS 2 ProSealed 4-spool AMS that dries up to 65 °C. Works with every Bambu Lab printer, with the connection parts each one needs.Pre-Order$430.00View product
Bambu Lab AMS HT Bambu Lab AMS HT1-spool AMS that dries up to 85 °C for nylon, PC and other high-temperature filament, with a bypass outlet for soft TPU. Up to 8 on an H2D, H2C, H2S or X2D.Pre-Order$200.00View product
All guides ↑
A Bambu Lab hotend next to a nozzle cleaning kit: needles, brushes, wrenches and tweezers

Which nozzle, and how to swap it

For owners of a Bambu Lab A1 or P2S or an Elegoo Centauri Carbon 2. Learn when to clean and when to replace a nozzle, which material and size fits your filament, and how to swap it at home.

Step by step

  1. Clean first, replace if it's worn. First look at the tip: if it looks worn or misshapen, replace the nozzle. Otherwise heat the nozzle 10-20°C above the filament's normal temperature and try to push filament through. If it doesn't flow, gently push a cleaning needle up into the tip from below. Once filament flows again, do a cold pull to clear what is left inside. Replace the nozzle if the needle won't go in or nothing comes out after cleaning.
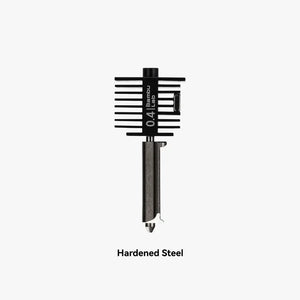
  2. Match the nozzle to your filament. Stainless steel is fine for everyday PLA, PETG, ABS and TPU. Carbon fiber (CF) and glass fiber (GF) filaments need hardened steel or tungsten carbide. The Centauri Carbon 2 already comes with a hardened steel nozzle. Keep 0.4 mm for everyday prints, 0.2 mm for tiny detail, and 0.6 or 0.8 mm for big, strong parts.
  3. Swap on a Bambu Lab A1 (no tools). Turn the printer off, unplug it and let the nozzle cool. Press the filament lever on the right to release the filament, then take off the front cover and the silicone sock. Push the buckle to the right to unlock it, swing its left side out, and pull the hotend out by its heatsink. Slide the new hotend in tilted slightly toward the back, press it flat, close the buckle (left side first, then right), and refit the sock and cover.
  4. Swap on a Bambu Lab P2S. Turn the printer off, unplug it and put on heat-resistant gloves. Open the magnetic toolhead front cover and pull the silicone sock diagonally down. Release the hotend clip (right side first, then the left metal plate) and lift the hotend out by its heatsink. Fit the new hotend with the clip fully open, check it sits fully against the heater, close the left plate, then press the right ring into place. Push the sock back on from the bottom and close the front cover.
  5. Swap on an Elegoo Centauri Carbon 2 (6 mm wrench + pliers). Lift off the print head's front cover, unplug the model cooling fan cable and remove the black silicone sock. Heat the nozzle to 220°C and put on heat-resistant gloves. Hold the hotend with pliers (never by the thermistor wires), unscrew the old nozzle with a 6 mm wrench and tighten the new one while it is still hot. Set the temperature to 0 and wait about 5 minutes for it to cool. Refit the sock, plug the fan cable back in and refit the cover.
  6. Tell the printer, then test. On the A1 tap Settings > Maintenance > Nozzle, and on the P2S tap Filament > Nozzle & Extruder > Nozzle Type, then pick the new size and material before you print. On the Centauri Carbon 2, pick the matching nozzle size in your slicer and re-level before the first print (Settings > Calibration > One-Click Self-Check). Then heat up, extrude a little filament to check it flows, and check the hotend doesn't wobble.

Common questions

When do I need a new nozzle, and when is a clean enough?

Clean first if some filament still comes out but is thin or uneven: heat the nozzle a little hotter and push filament through, clear the tip with a cleaning needle, then do a cold pull (the steps are in "Unclog and maintain your printer" below). Replace it if the tip is worn or damaged, the needle won't go in, or nothing comes out after cleaning. In humid summers, dry your filament before blaming the nozzle: damp filament bubbles and strings, much like a partly clogged nozzle.

Stainless steel, hardened steel or tungsten carbide: which filaments need which?

Stainless steel is for everyday PLA, PETG, ABS, ASA, PC and TPU, and brass nozzles (common on Elegoo Neptune and Creality Ender printers) cover the same everyday filaments. Carbon fiber and glass fiber filaments need hardened steel, and it is also the longer-lasting pick for glow-in-the-dark and metal-filled ones. Bambu Lab shows a stainless nozzle worn out after 10 hours of PETG-CF. Tungsten carbide (for the H2, P2S and X2D) is harder again, HRA 90 against 74 for hardened steel, and Bambu Lab rates it at about 50% longer life on fiber-filled filaments.

0.2 / 0.4 / 0.6 / 0.8 mm: what changes in my prints?

0.4 mm is the everyday balance of speed and quality. 0.2 mm gives very fine detail for miniatures, text and small logos, but prints slowly, and Bambu Lab does not recommend it for CF, GF, sparkle, marble, wood- or metal-filled filaments, nylon (PA) or TPU, which can clog it. 0.6 and 0.8 mm print large, strong parts faster with less fine detail, and Bambu Lab recommends a 0.6 mm hardened steel nozzle for most CF and GF filaments.

How do I swap it on an A1, a P2S and a Centauri Carbon 2?

On the A1 and P2S you swap the whole hotend with no tools: power off, open the clip, pull it out by the heatsink, click the new one in and set the new nozzle on the printer screen (steps 3, 4 and 6). On the Centauri Carbon 2 the nozzle screws in, so you swap it hot at 220°C with a 6 mm wrench while holding the hotend with pliers (step 5). If anything feels stuck, stop and send us a message on WhatsApp.

Products in this guide

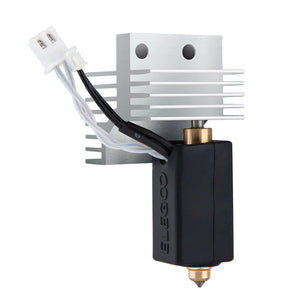
Bambu Lab Hotend Bambu Lab HotendThe swap part for Bambu Lab owners: pick A1/A2 for the A1 or A1 mini, H2/P2S/X2D for the P2S, then stainless steel, hardened steel or High Flow Tungsten Carbide (H2/P2S/X2D) and a size (steps 2-4).From $15.00Choose options
Bambu Lab Complete Hotend Assembly Bambu Lab Complete Hotend AssemblyFor X1 and P1 owners: a pre-assembled complete hotend in stainless or hardened steel.From $44.00Choose options
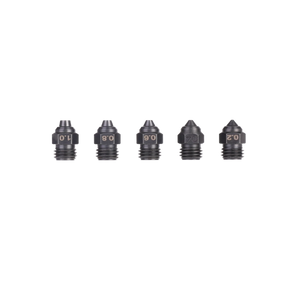
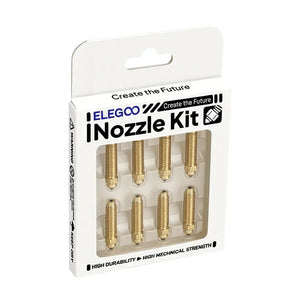
Elegoo Nozzle - Centauri Carbon / Carbon 2 / Hardened Steel (Pack of 8) Elegoo Nozzle - Centauri Carbon / Carbon 2 / Hardened Steel (Pack of 8)Spare screw-in nozzles for the Centauri Carbon and Centauri Carbon 2 (brass body, hardened steel tip): 8 x 0.4 mm, or a mixed set of 0.2, 0.4, 0.6 and 0.8 mm.$25.00Choose options
Elegoo Hotend Elegoo HotendReplacement hotend for the Centauri Carbon and the Neptune 4 series, for when more than the nozzle is damaged.From $15.00Choose options
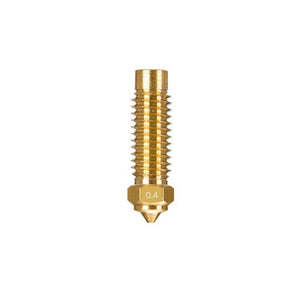
Elegoo Nozzle Elegoo NozzleSingle brass or hardened steel nozzles for Neptune 4 series, Centauri Carbon and OrangeStorm Giga owners.From $2.00Choose options
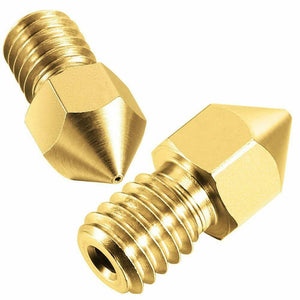
Creality Nozzle Creality NozzleFor Creality owners (Ender-3, CR, Sprite, K1/KE, K2 Plus and more): brass or hardened steel nozzles from 0.2 to 1.2 mm.From $1.00Choose options
Sovol SV08 Max Hardened Steel Nozzle Sovol SV08 Max Hardened Steel NozzleReplacement hardened steel nozzle for the Sovol SV08 Max, in 0.4 or 0.8 mm, for CF/GF and everyday filaments.$13.00Choose options
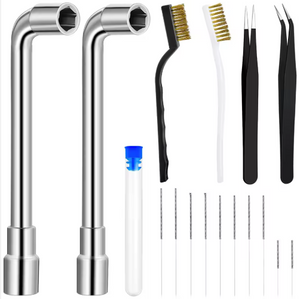
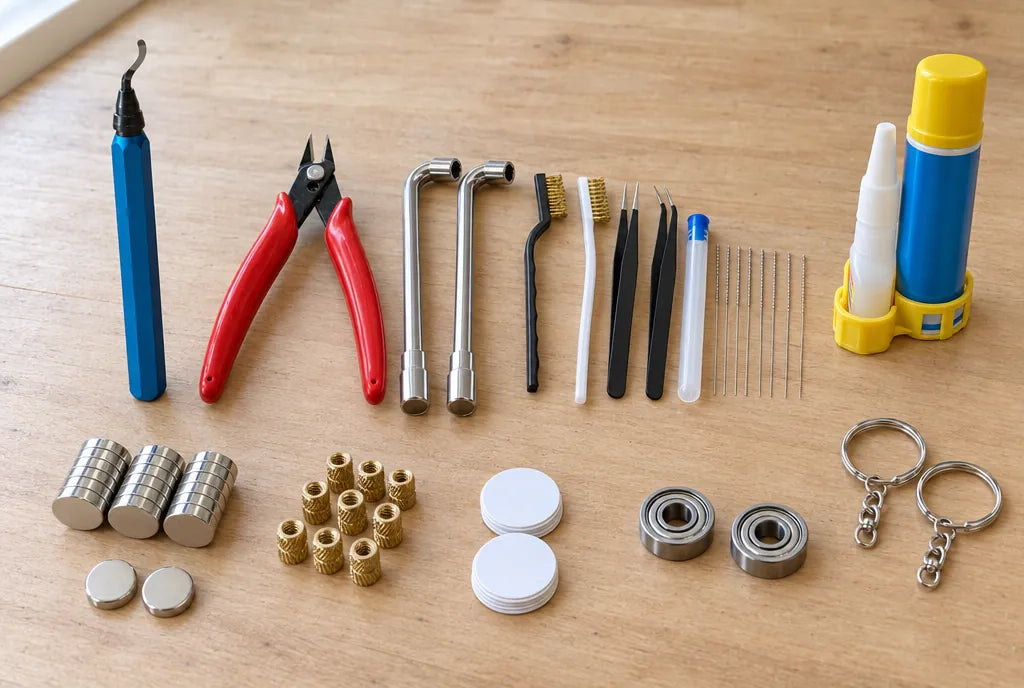
Cube Nozzle Cleaning Kit (16 pcs) Cube Nozzle Cleaning Kit (16 pcs)Cleaning needles from 0.15 to 0.5 mm, brushes, tweezers and nozzle wrenches: clean before you replace.Pre-Order$12.00View product
All guides ↑
A gold textured PEI build plate with a green printed part on it, over a second Bambu Lab plate

Choose your build plate

For anyone with an FDM 3D printer who wants a second plate or a better first layer. Learn what each surface does to the bottom of a print, which one suits PLA, PETG, TPU and ABS, when to use glue and how to keep the plate clean.

Step by step

  1. Check the plate you already have. Bambu Lab printers come with a Textured PEI Plate as standard. A new plate must match your printer's bed size: 180 x 180 mm for the A1 mini, 256 x 256 mm for the A1, P1, P2S, X1 and X2D, 350 x 320 mm for the H2D and H2S, and 330 x 320 mm for the H2C. Bambu's 256 mm plates come in two generations. If your printer says the plate is not recognized, tap Resolved or turn off plate detection, and the plate still works.
  2. Pick a surface for your filament and the look you want. Textured PEI handles almost everything and gives a textured, matte bottom. Cool Plate SuperTack gives a smooth bottom with PLA and PETG and needs no glue. The Engineering Plate, with glue, is made for ABS, ASA, PC and nylon. Starry, Galaxy, Diamond and Carbon Fiber plates press a shimmering pattern into PLA and TPU prints.
  3. Prepare the plate. Start with a clean, dry plate and hold it by the sides, because skin oil weakens the grip. If your plate and filament need glue, spread a thin, even layer before you start the print.
  4. Tell the printer which plate is on. Choose the same plate type in Bambu Studio so the bed heats to the right temperature. For a Starry, Galaxy, Diamond or Carbon Fiber plate, choose Smooth PEI/High Temp Plate. On an X1, X2 or P2 series printer, turn off build plate position detection when you use these plates. On an X1, also skip the lidar calibration, because the shine confuses it. Never put glue on them.
  5. Let it cool, then flex. Wait until the plate is fully cool (Bambu suggests 35 °C or lower), take it off and gently bend it so the print pops off. If a SuperTack print sticks too hard, put the plate back on the bed, warm it to about 50 °C and try again. For TPU, lift one corner and spray a little alcohol into the gap.
  6. Wash it now and then. Wet the plate, scrub it with a sponge and plain dish soap, rinse with clean water and dry it with a paper towel. In humid summer weather, finish drying it on the heated bed. Never use acetone on any plate.

Common questions

What does each surface do to the bottom of a print?

Textured PEI leaves a textured, matte finish. Smooth PEI and Cool Plate SuperTack leave a smooth bottom, and the Engineering Plate leaves a flat, smooth one. Starry, Galaxy, Diamond and Carbon Fiber plates press in a pattern that changes color as the light moves.

Which plate came with my printer, and which second plate is worth buying?

Bambu Lab printers come with a Textured PEI Plate as standard. If you mostly print PLA and PETG, a Cool Plate SuperTack is the easy second plate: smooth bottoms and no glue. Pick the Engineering Plate for ABS, ASA, PC and nylon, or a 3D Effect plate such as Starry for gifts, best with silk or shiny filament. For Elegoo or Creality printers, pick your printer model from the options or ask us on WhatsApp.

Which surface for PLA, PETG, TPU and ABS?

PLA works on every Bambu surface, with glue on the Engineering Plate and the original Cool Plate. On SuperTack, avoid Bambu PLA Silk, which sticks too hard. PETG works on Textured PEI and SuperTack, or on Smooth PEI and the Engineering Plate with glue. TPU works on Textured PEI and the 3D Effect plates, or on Smooth PEI and the Engineering Plate with glue, never on SuperTack. ABS works on Textured PEI, or on Smooth PEI and the Engineering Plate with glue.

Do I need glue, and how do I clean the plate?

Textured PEI and SuperTack need no glue, though a thin layer helps PETG come off Textured PEI. Smooth PEI and the High Temperature sheet need glue for everything except PLA. The Engineering Plate always needs it, and the original Cool Plate needs it even for PLA. Never put glue on Starry, Galaxy, Diamond or Carbon Fiber plates. Wash the plate and any glue off with dish soap, warm water and a sponge, then rinse and dry it. Never use acetone.

Products in this guide

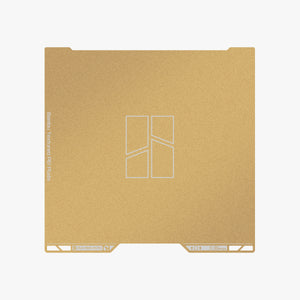
Bambu Lab Build Plate Bambu Lab Build PlateEvery Bambu Lab surface, in A1 mini, A1/X1/P1/P2, H2S/H2D and H2C sizes. The product page has a table of which surface suits which filament.From $16.00Choose options
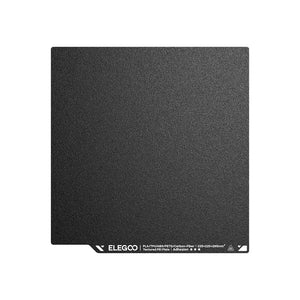
Elegoo Build Plate Elegoo Build PlateSpare or second plate for Elegoo owners: textured PEI for the Neptune 4 series, and a 3-plate double-sided pack for the Centauri Carbon.From $17.00Choose options
Creality Build Plate Creality Build PlateReplacement plate for Creality owners: Ender-3, Ender-3 Pro, Ender-3 SE/KE/V3, Ender-3 V3 Plus, S1 Pro, S1 Plus, K2 Plus, Hi, CR-10 S4/S5 and CR-10 Smart Pro sizes in PEI, textured PEI, frosted PEI, glass, spring steel, textured steel and epoxy.From $17.00Choose options
Cube IPA Cleaning Solution 5 Litres Cube IPA Cleaning Solution 5 LitresRefill for the IPA spray bottle.$25.00
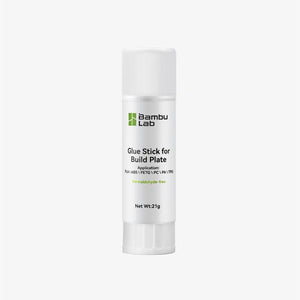
Bambu Lab Glue for Build Plate - Glue Stick Bambu Lab Glue for Build Plate - Glue StickGlue for Smooth PEI and the High Temperature sheet (everything except PLA), the Engineering Plate (always) and the original Cool Plate (even PLA). It also works as a release layer for PETG on Textured PEI. Never on 3D Effect plates.Coming Soon$5.00View product
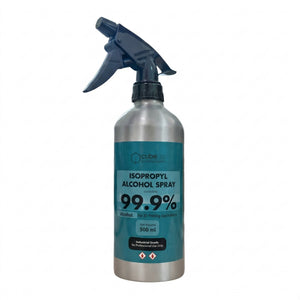
Cube IPA Cleaning Solution Spray Bottle 500mL Cube IPA Cleaning Solution Spray Bottle 500mLIPA spray: wipe the plate before each print, release stuck TPU prints, clean off glue marks.Coming Soon$11.00View product
All guides ↑
A white printed box with brass heat-set inserts in its corners and a lid with round magnets, next to loose inserts and magnets

Make prints functional: heat-set inserts and magnets

For anyone who wants printed parts with screw threads that last and lids that snap shut. You will learn which tool and temperature to use for brass inserts, what holes to design, and how to fit magnets with the right polarity.

Step by step

  1. Get the right tool. Brass inserts are set with a temperature-controlled soldering iron, ideally with a heat-set tip that matches the insert size. In Lebanon, pick a 220-240 V iron, not a 110 V model. Heat-setting is for FDM prints like PLA, PETG and ABS. Resin parts do not melt, so glue inserts into them with thick CA glue or epoxy. Magnets need no tool, just a drop of CA glue if a fit is loose.
  2. Design the holes. For inserts, make the hole 0.2 mm smaller than the insert's outer diameter and 0.5-1 mm deeper than its length, so melted plastic has room below it. The outer diameter is the last number in the size name: M3x5x4.5 is 4.5 mm wide, so its hole is 4.3 mm. For magnets, make the hole 0.1-0.2 mm wider than the magnet and as deep as it is thick. Printed holes often come out a little small, so print a test block first.
  3. Heat and sink the insert. Set the iron 10-20°C above your print temperature: about 225°C for PLA, 245°C for PETG and 265°C for ABS. Keep the part flat with the hole facing up, rest the insert on the hole and let the tip sink it straight down with light pressure, about 90% of the way.
  4. Press it flush and hold. Lift the iron and press the insert flush with a flat metal tool. Hold it there for a few seconds while the plastic sets, or it can creep back up.
  5. Fit the magnets. Press magnets into open pockets and add a drop of CA glue if they feel loose. To hide a magnet inside the part, add a pause in your slicer at the first layer that covers the pocket. The printer stops before printing that layer: drop the magnet in, check it sits flush so the nozzle cannot hit it, then resume.
  6. Check polarity before gluing. Snap your magnets into one stack. Use one end of the stack to place the box magnets and the other end for the lid magnets. Test that the lid snaps on before any glue goes in.

Common questions

What do I heat the inserts with, at what temperature, and how do I keep them straight?

Use a temperature-controlled soldering iron (220-240 V), ideally with a heat-set tip sized to the insert. Set it 10-20°C above your print temperature, about 225°C for PLA, 245°C for PETG and 265°C for ABS. Keep the part flat and the iron vertical, sink the insert about 90% of the way, then press it flush with a flat metal tool and hold a few seconds.

What hole do I design for the inserts?

Make it 0.2 mm smaller than the insert's outer diameter (the last number in the size name) and 0.5-1 mm deeper than its length. For example, an M3x5x4.5 insert needs a 4.3 mm hole, 5.5-6 mm deep. Printed holes often come out smaller than designed, so test on a small block and adjust in 0.1 mm steps.

How do I embed magnets: press-fit, glue, or pause the print and drop them in?

All three work. For an open pocket, make it 0.1-0.2 mm wider than the magnet so it press-fits, and add CA glue if it is loose. To seal a magnet inside, open your slicer's preview, move the layer slider to the first layer that covers the pocket, right-click it and choose Add Pause. The printer stops before that layer: drop the magnet in, check it sits flush, then resume. Keep loose magnets away from the nozzle and steel parts while the head moves.

How do I get the polarity right on a box and its lid?

Snap all your magnets into one stack. Press one end of the stack into each box hole and slide it off so one magnet stays behind, then do the lid with the other end of the same stack. The box and lid will attract every time; test the fit before you glue.

Which free MakerWorld models are good first practice?

For inserts, try "Testpart for threaded inserts M2-M6" (its holes suit the author's inserts, so check the fit with yours) or the "Heat Insert Tester Generator", which lets you set your own hole size. For magnets, "Magnetic Box (V1)" is made for 6 x 3 mm magnets and teaches box-and-lid polarity, and the "HX8 Magnet Pen" works with 5, 6, 8 and 10 mm magnets for clean placement.

Products in this guide

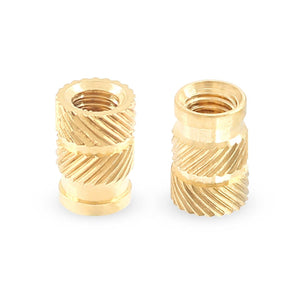
Cube Knurled Brass Insert Nuts (Pack of 10) Cube Knurled Brass Insert Nuts (Pack of 10)Brass inserts from M2 to M6. The size name gives the outer diameter and length, for sizing the hole.From $1.00Choose options
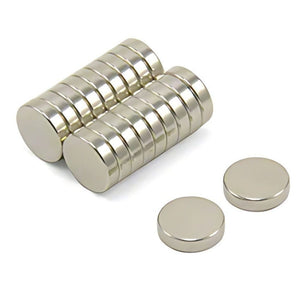
Cube N52 Magnets Cube N52 MagnetsThe magnets for press-fit, glued or pause-and-drop pockets; the 6 x 3 mm size fits the Magnetic Box (V1) practice model.From $7.00Choose options
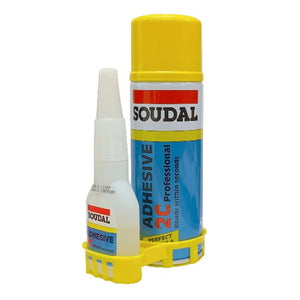
Soudal CA Glue 400ml Soudal CA Glue 400mlCA glue plus activator spray: bonds multi-part prints in seconds.$6.00
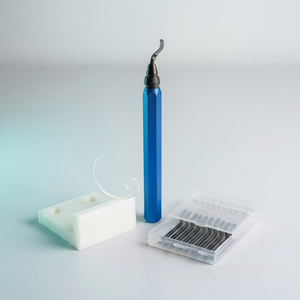
Cube 3D Print Deburring Tool Cube 3D Print Deburring ToolShave seams, strings, sharp edges and elephant foot, and clean the rim of holes.$10.00
Cube Maker Tools Bundle Cube Maker Tools BundleM4 inserts, 8 x 3 mm magnets, CA glue and a deburring tool, plus other maker tools, in one bundle.Coming Soon$44.00View product
All guides ↑
A nozzle cleaning kit laid out with Bambu Lab lubricant oil tubes and a clean cloth

Unclog and maintain your printer

For anyone who owns an FDM 3D printer and wants it to keep printing well. Learn how to spot and clear a nozzle clog, oil the rails, clean the plate and nozzle, and when to ask Cube for help. The steps follow Bambu Lab's official guides; on other brands, check your printer's manual for its own temperatures and lubrication points.

Step by step

  1. Spot a clog early. A clog shows as gaps in your print, because not enough plastic comes out, or the printer moves but no plastic comes out at all. When you extrude by hand, the filament may curl to one side instead of flowing straight down. In humid summers, keep filament sealed in a dry box: damp filament causes bubbles, stringing and poor flow.
  2. Clear the tip with a needle. Heat the nozzle to 250 °C (Bambu Lab's setting for PLA, PETG, TPU and ABS), move the bed away from the nozzle and put on heat-resistant gloves. Keep your face away, because hot plastic can spray out. Pick a needle no wider than your nozzle and slide it into the tip a few times, without pushing deep, which can push the clog higher. On X1 and P1 printers with a 0.2 mm nozzle, Bambu Lab says to skip the needle.
  3. Finish with a cold pull. Check your printer's guide first: some printers need the PTFE tube taken off before you start. Load PLA at 220 °C until it flows from the tip, then set the nozzle to 100 °C and wait. Retract the filament from the screen while gently helping it by hand, without pulling hard. Look at the tip of the pulled filament and repeat until it comes out clean.
  4. Clean the outside of the nozzle. With the nozzle hot and your gloves on, brush burnt plastic off the outside with the brass brush and pick off soft blobs with the tweezers. For PLA, heating to about 250 °C, a bit above printing temperature, softens a blob. If your hotend has a silicone sock, take it off with gloves on and clean it. If a big blob has covered the hotend, do not pull parts off by force, as this can damage them; message us on WhatsApp.
  5. Oil the rails, grease the lead screws. On Bambu Lab printers, check about every 3 months. Wipe off dust first, then put a thin layer of lubricant oil on the linear guides, rails and steel shafts, and grease on the lead screws. Wipe off the extra so it does not build up. On X1 and P1 series printers, never oil or grease the X-axis carbon rods. On other brands, follow your printer's manual.
  6. Wash the build plate. Before each print, wipe the plate with IPA on a clean paper towel to remove dust and finger grease; that is what we use in our shop. When prints stop sticking, wash it with dish soap and warm water using a sponge, rinse, and dry it with a paper towel. Use a plain dish soap without added oils or moisturizers. Hold the plate by its edges, because finger oils make prints lose grip.

Common questions

What does a clog look like, and needle or cold pull: which first?

Look for gaps in your print, because not enough plastic comes out (under-extrusion), or a printer that moves while nothing comes out of the nozzle. Use the needle first on a hot nozzle to free the tip, then finish with a cold pull to clean the inside, as Bambu Lab strongly recommends after every cleaning. Bambu Lab also recommends a cold pull at least once a month, especially when you switch filament types.

Where and how often do I oil the rails (and grease the lead screws)?

On Bambu Lab printers, oil goes on linear guides, slide rails and steel shafts, and grease goes on the lead screws, the threaded rods that move the bed or gantry up and down. Bambu Lab recommends checking and reapplying about every 3 months and wiping off the excess; oil also works on lead screws but evaporates faster, so reapply it more often. Never put oil or grease on the X-axis carbon rods of X1 and P1 printers. On other brands, follow your printer's manual.

How do I clean the plate and the nozzle?

Wipe the plate with IPA on a clean paper towel before each print, and wash it with dish soap and warm water when prints stop sticking; never use acetone on a textured PEI plate. For the nozzle, brush off burnt plastic with the brass brush while it is hot, then use the needle and a cold pull for the inside.

When should I ask Cube for help?

If the clog comes back after the needle and a few cold pulls, a blob has covered the hotend, or the printer keeps clicking or showing heater errors, stop and message us on WhatsApp. Printer repairs are done at Cube's Mansourieh workshop. Clogs and hotend blobs come from use, so fixing them is a paid repair, not a warranty fault; your 1-year warranty, handled here in Lebanon, covers faults in the printer itself. On Bambu Lab printers, a spare hotend lets you keep printing while the clogged one is cleaned.

Products in this guide

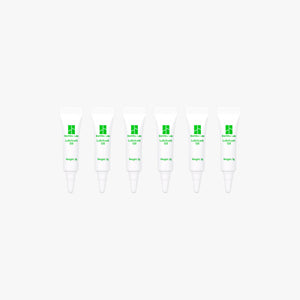
Bambu Lab Lubricant Oil Bambu Lab Lubricant OilBambu Lab oil for linear guides, slide rails and steel shafts, about every 3 months. It also works on lead screws if you reapply it more often. Never on X1 and P1 carbon rods.$8.00
Cube IPA Cleaning Solution 5 Litres Cube IPA Cleaning Solution 5 LitresCube IPA cleaning solution in a bulk 5-liter container, for frequent use.$25.00
Bambu Lab Hotend Bambu Lab HotendSpare hotend with nozzle for Bambu Lab printers (choose your printer model): swap it in when a nozzle is worn or a clog will not clear, and keep printing.From $15.00Choose options
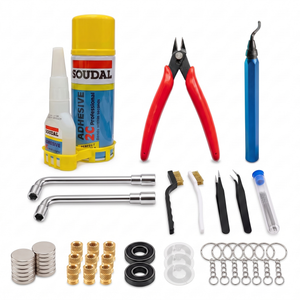
Cube Nozzle Cleaning Kit (16 pcs) Cube Nozzle Cleaning Kit (16 pcs)Cleaning needles from 0.15 to 0.5 mm, brushes, tweezers and nozzle wrenches: clean before you replace.Pre-Order$12.00View product
Cube IPA Cleaning Solution Spray Bottle 500mL Cube IPA Cleaning Solution Spray Bottle 500mLIPA spray: wipe the build plate before each print.Coming Soon$11.00View product
Cube Maker Tools Bundle Cube Maker Tools BundleM4 inserts, 8 x 3 mm magnets, CA glue and a deburring tool, plus other maker tools, in one bundle.Coming Soon$44.00View product
All guides ↑
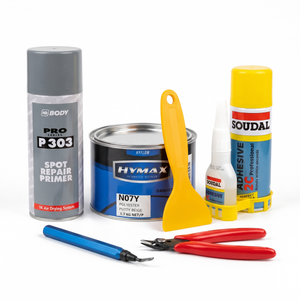
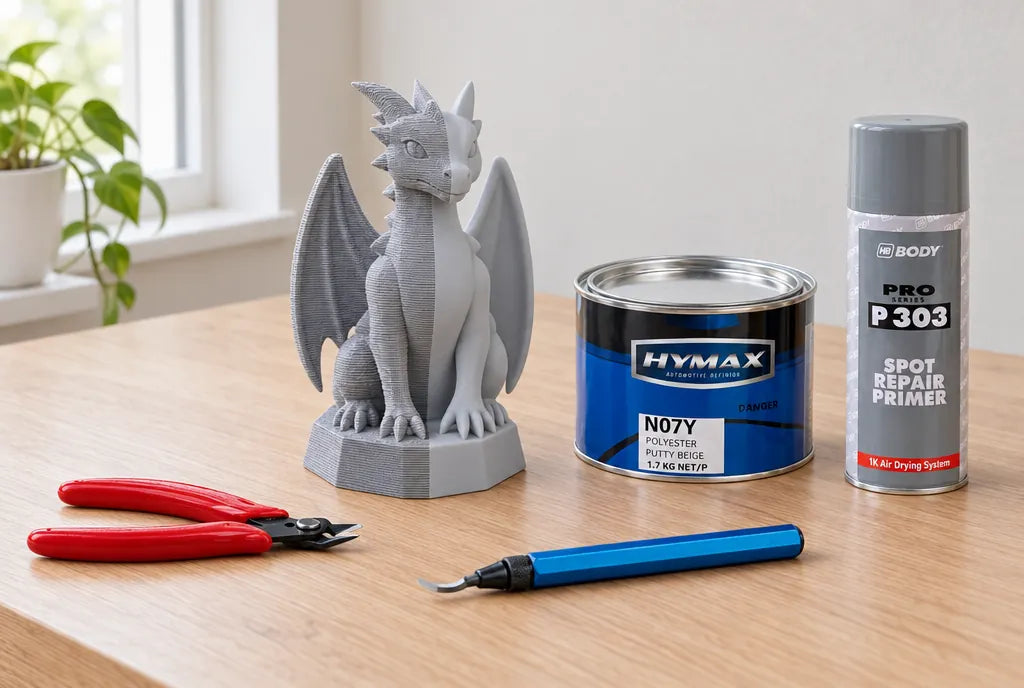
Cutting pliers, a deburring tool, Hymax putty and HB Body P303 primer next to a printed dragon figure

From plate to finished part

For anyone who just took a print off the plate and wants a clean, paint-ready part. You will learn how to remove supports, clean edges and holes, glue parts together, fill layer lines and prime for paint.

Step by step

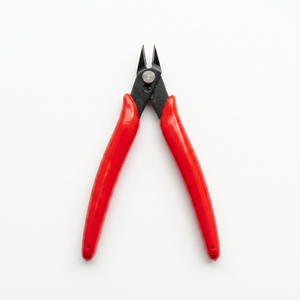
  1. Take off the supports. Let the print cool to room temperature, then take it off the plate. Remove supports soon after, ideally within 2 hours, before they soak up moisture from humid air and get harder to remove. Snap big supports away by hand, and use the Cube Cutting Pliers to cut supports flush where they touch the part, instead of pulling near thin details. Wear glasses: support pieces can be sharp and can fly off.
  2. Clean edges and holes. Run the Cube 3D Print Deburring Tool along the edges to shave off seams, strings, sharp burrs and the flared first layer (elephant foot). For a hole, rest the blade on the rim and turn the tool around it. Go gently: the blade swivels to follow the edge, so there is no need to press hard.
  3. Glue multi-part prints. Dry-fit the parts first so they close without gaps. Spray the Soudal activator on one face, put drops of the CA glue on the other, then press them together and hold for at least 1 minute. The glue grabs within seconds, so line the parts up before they touch. On hot summer days, glue in a cool room, out of the sun.
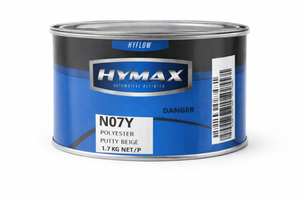
  4. Fill gaps and layer lines. Mix a small amount of Hymax polyester putty with its hardener, following the instructions on the tin, and spread a thin layer over seams, gaps and layer lines with a spatula. Once it is hard, sand it with P100 sandpaper. Repeat until the gaps are gone. Work outdoors or in a well-ventilated room.
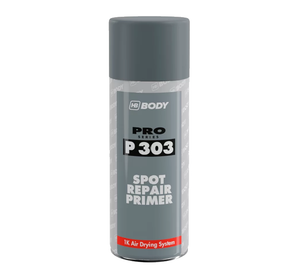
  5. Prime, sand and paint. Shake the HB Body P303 primer can for 2 to 3 minutes after the ball inside starts to rattle. Spray 2 to 3 thin coats from 20 to 30 cm in smooth, long strokes, without stopping on one spot, and wait about 5 minutes between coats. After 20 to 30 minutes, sand lightly with P400 sandpaper, and add another coat if lines still show. HB Body gives 10 to 25 °C as the best range, so in summer spray in the shade, early or late in the day. Test on a scrap print first. Your part is now ready for paint.

Common questions

How do I remove supports cleanly without breaking the part?

Cut, do not pull. Snip each support with flush-cut pliers right where it touches the part, then lift the loose pieces away; a scalpel or hobby knife helps with small stuck bits. Do it soon after printing, before the supports soak up moisture. Wear glasses, because support pieces can be sharp and fly off.

How do I deburr holes and edges?

Use a swivel-blade deburring tool. Rest the blade on the edge or on the rim of the hole and pull or turn it gently; the blade swivels to follow the edge and shaves off a thin curl of plastic. It also cleans up seams, strings and elephant foot.

How do I fill layer lines (putty, sanding) and prime for paint?

Spread a thin layer of automotive polyester putty over gaps and layer lines, let it harden, sand with P100 sandpaper and repeat until smooth. Then spray 2 to 3 thin coats of primer from 20 to 30 cm in long, smooth strokes, let it dry and sand with P400 before painting. Work outdoors or by an open window and wear protective gear, since putty and spray primer give off strong fumes.

How do I glue multi-part prints?

Use CA glue with its activator: spray activator on one part, add drops of glue on the other, press together and hold for at least 1 minute. Dry-fit first, because the glue grabs within seconds. Without the activator CA glue still works, it just sets much slower. CA glue is fine for PLA and PETG parts that do not carry much load. Bambu Lab notes it can crack in the cold or over time, so use an epoxy glue for strong joints.

Products in this guide

Cube Print Finishing Bundle Cube Print Finishing BundlePliers, deburring tool, putty with a spatula, P303 primer and the Soudal CA glue kit in one bundle. Sandpaper is not included.$40.00
Cube Cutting Pliers Cube Cutting PliersFlush-cut supports where they touch the part, and trim filament.$4.00
Cube 3D Print Deburring Tool Cube 3D Print Deburring ToolShave seams, strings, sharp edges and elephant foot, and clean the rim of holes.$10.00
Soudal CA Glue 400ml Soudal CA Glue 400mlCA glue plus activator spray: bonds multi-part prints in seconds.$6.00
Hymax Polyester Putty Beige 1.7 kg Hymax Polyester Putty Beige 1.7 kgPolyester putty to fill seams, gaps and layer lines before sanding.$7.00
HB Body P303 Spot Repair Primer 400ml HB Body P303 Spot Repair Primer 400mlSpray primer that levels the surface and gives paint a smooth base.$13.00
All guides ↑
A printed marble run in red, white and blue, with a printed keychain holding an NFC tag

Maker projects: NFC tags and Maker's Supply kits

For anyone with a Bambu Lab printer who wants to build something that moves, lights up or talks to a phone. You will learn where to download the parts for each Maker's Supply or CyberBrick kit, how long they print, what else to have ready, and how to program a Cube NFC tag with your phone.

Step by step

  1. Open the model your kit is made for. Each kit holds only the hardware (motor, marbles, LEDs, electronics). The plastic parts are a free download on MakerWorld (makerworld.com): search for the kit's name, like Marble Run 003, or use the links in the FAQ below. Pick the print profile that matches your printer and nozzle.
  2. Print the parts in PLA. Open the model in Bambu Studio or Bambu Handy and send it plate by plate. The official profiles use PLA, so a few spools of PLA Basic cover most builds. Clean the build plate first. In humid summer months keep spools sealed with desiccant, because damp PLA can turn brittle and snap during a long print.
  3. Gather the small extras. Check the model's parts list before you start. The Clock and Wireless Mouse kits need one AA battery, and the Marble Run motor and the LED Lamp plug into a 5 V USB charger. Batteries and chargers are not in the box. The CyberBrick remote takes 3 AAA alkaline batteries. Some community designs also call for CA glue, magnets or brass inserts.
  4. Assemble with the official guide. Follow the Assembly Guide or video on the MakerWorld page, step by step. Test each moving part by hand before you close the shell.
  5. Program and hide an NFC tag. Write a web link to the tag with a free phone app, then tap the tag with your phone to test it. Links open on both iPhone and Android; contact cards and Wi-Fi logins work on many Android phones but not on iPhone. Stick the tag into a pocket in your print, or add a pause in Bambu Studio (Preview, right-click the layer slider, Add Pause) at the layer that closes the pocket, drop the tag in and resume.
Common questions

Where do I download the parts to print?

On MakerWorld (makerworld.com). Search for the kit's name there. For example, Marble Run 003 is at makerworld.com/en/models/14265 and Engine Model 005 is at makerworld.com/en/models/14267, both official Bambu Lab models. You can also open them straight from Bambu Studio or the Bambu Handy app.

How long does it print, on which printer, in which filament?

It depends on the kit. The Wireless Mouse 002 takes about 5 hours and 91 g of PLA, while the Marble Run 003 takes about 37 hours and about 1.1 kg of PLA over 11 plates. Bambu Lab's own kit models (Marble Run, Engine, Wireless Mouse and LED Lamp) are set up for PLA on every current Bambu Lab printer, including the A1 mini. The Tourbillon's kit profile is not set up for the A1 mini. The Jet Engine's kit profile isn't either, but its page also has a separate A1 mini profile. CyberBrick vehicles also use a little TPU and PETG.

What else do I need (glue, inserts, batteries)?

The Clock 011 and Wireless Mouse 002 kits each need one AA battery, which is not in the box. The Marble Run and LED Lamp plug into a 5 V USB charger, which is not in the box either. CyberBrick kits include a rechargeable battery and a charger, and each standard remote takes 3 AAA alkaline batteries, which are not included. Avoid carbon batteries, which can cause connection drops. Some community designs also ask for CA glue, magnets or brass inserts, so check the parts list on the model page.

How do I program an NFC tag with my phone?

Install the free NFC TagWriter by NXP app (Android or iPhone), choose Write, pick what to store and hold the tag against your phone (near the top on an iPhone). A web link works on iPhone XS and newer and on NFC Android phones. Contact cards and Wi-Fi details work on many Android phones, but an iPhone only opens links, email, phone and text actions from a tag. On iPhone you can also use the Shortcuts app: Automation, then NFC, scan the tag and pick an action, which runs on your own iPhone only. Test the tag before you seal it in, and only write-protect it once the content is final.

Products in this guide

Cube NFC RFID Tag (Pack of 3) Cube NFC RFID Tag (Pack of 3)Rewritable 25 mm NFC sticker tags to program with your phone and embed in a print.From $1.00Choose options
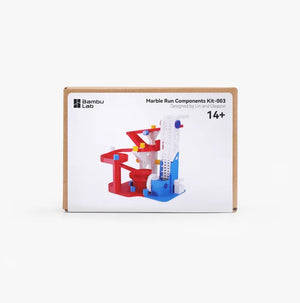
Bambu Lab Maker's Supply - Marble Run Components Kit-003 Bambu Lab Maker's Supply - Marble Run Components Kit-003Hardware for Bambu Lab's Marble Run 003 model: USB motor and marbles.$15.00
Bambu Lab Maker's Supply - Engine Model Components Kit-005 Bambu Lab Maker's Supply - Engine Model Components Kit-005Hardware for Bambu Lab's V-twin Engine Model 005.$15.00
Bambu Lab Maker's Supply - Wireless Mouse Components Kit-002 Bambu Lab Maker's Supply - Wireless Mouse Components Kit-002Quick first build (about 5 hours of printing); needs one AA battery.$18.00
Bambu Lab Maker's Supply - LED Lamp Kit-001 Bambu Lab Maker's Supply - LED Lamp Kit-001Easy lighting build; many free lamp shades on MakerWorld fit it.$18.00
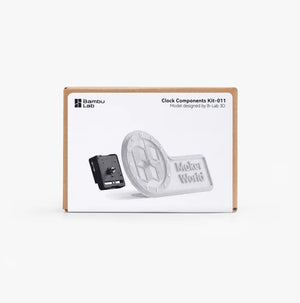
Bambu Lab Maker's Supply - Clock Components Kit-011 Bambu Lab Maker's Supply - Clock Components Kit-011Clock movement for printed clock faces; needs one AA battery.$12.00
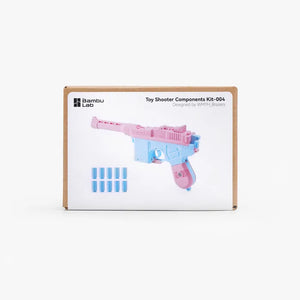
Bambu Lab Maker's Supply - Toy Shooter Components Kit-004 Bambu Lab Maker's Supply - Toy Shooter Components Kit-004Hardware for the Toy Shooter model Bambu Lab links.$9.00
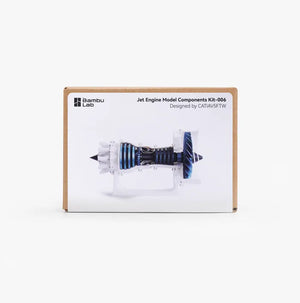
Bambu Lab Maker's Supply - Jet Engine Model Components Kit-006 Bambu Lab Maker's Supply - Jet Engine Model Components Kit-006Hardware for the 3D-printable Jet Engine, a long build of about 38 hours.$37.00
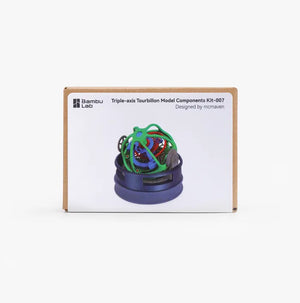
Bambu Lab Maker's Supply - Triple-Axis Tourbillon Model Components Kit-007 Bambu Lab Maker's Supply - Triple-Axis Tourbillon Model Components Kit-007Hardware for the TT Furious Tourbillon, about 38 hours over 24 plates.$60.00
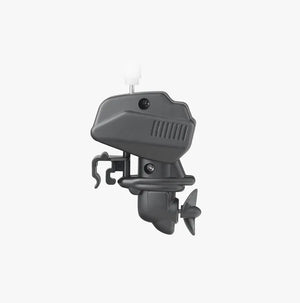
Bambu Lab Maker's Supply - Boat Model Components Kit-010 Bambu Lab Maker's Supply - Boat Model Components Kit-010Wind-up boat motor; a 2-hour print and a quick first project.$8.00
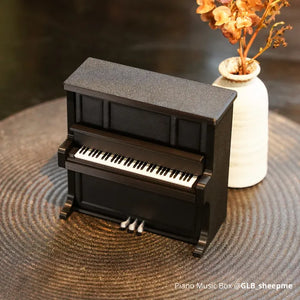
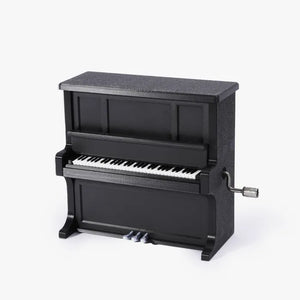
Bambu Lab Maker's Supply - Piano Music Box Bottom Winding Kit-K014 Bambu Lab Maker's Supply - Piano Music Box Bottom Winding Kit-K014Music box movement wound from the bottom.$8.00
All guides ↑